Sushi Rice
Updated on 11 Jan 2021.
Sushi (すし、寿司) is a Japanese dish made up of cooked vinegared rice which is commonly topped with other ingredients or put into rolls.
See Also:
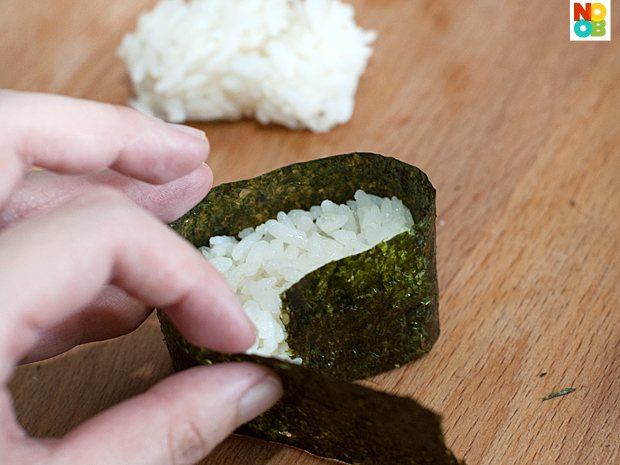
- Onigiri (Japanese Rice Balls) Recipe
- Kappa Maki (Cucumber Sushi Roll) Recipe
- California Temaki (Handroll) Recipe
With the base sushi rice (酢飯) recipe, you can make all types of sushi such as nigiri zushi, maki zushi, inari zushi and temaki. For fellow sushi lovers, here’s a step-by-step photo tutorial on how to cook sushi rice. This will be the base rice recipe for all sushi recipes.
STEP-BY-STEP PHOTOS
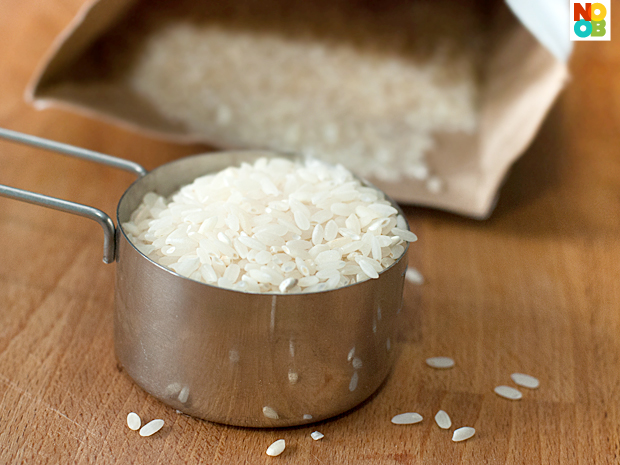
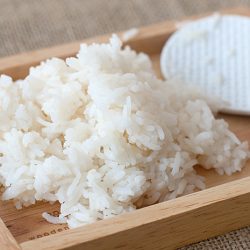
Measure the rice. Use short-grain white rice.
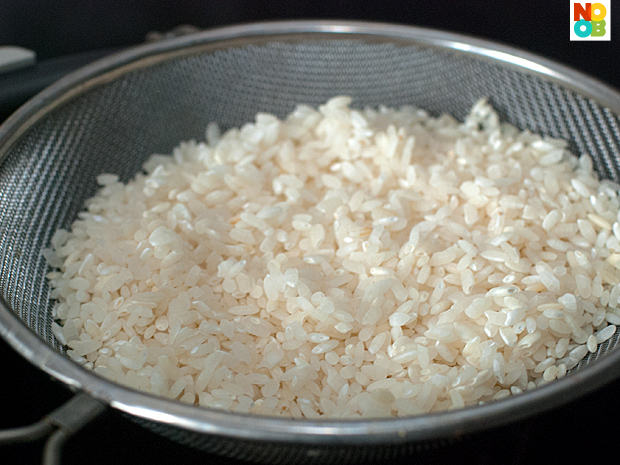
Rinse the rice in a few changes of water until the water runs less cloudy (skip this step if you are using pre-washed rice). Drain the rice in a colander for roughly 30 minutes. Draining the rice is believed to improve the texture and appearance of the cooked rice, but I skip this step most of the time.
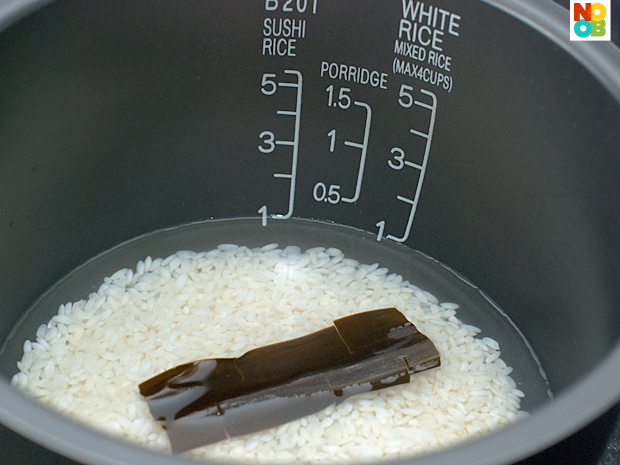
Measure and add water for cooking the rice (1 cup rice: 1 1/4 cup water). My rice cooker is a Japanese brand so the pot came with its own water marking for sushi rice. Also, there is a mode to schedule the completed cooking time of the rice, so I take this chance to soak the rice for about 1-2 hours before it starts cooking. Optional – add a piece of kelp/konbu (make cuts all over; pictured above) and sake for additional flavour. Cook the rice using a rice cooker or simmer over the stove top.
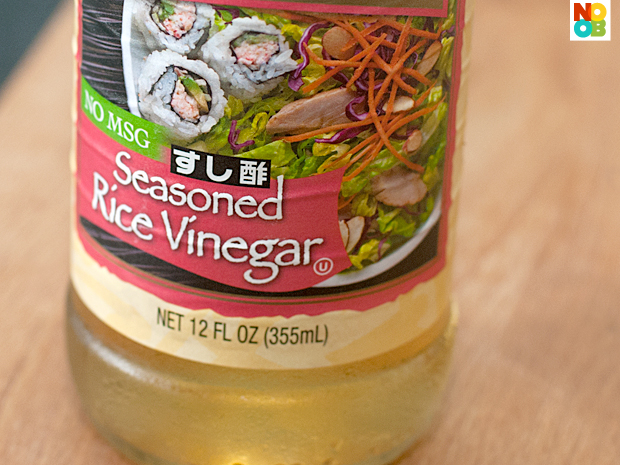
While waiting for the rice to cook, prepare vinegar mixture by mixing rice vinegar, sugar and salt in a small, non-aluminum saucepan over low heat until the sugar dissolves. You may also use a microwave oven and heat using low power for about a minute. Alternatively, use ready-made seasoned rice vinegar which has already been mixed with sugar & salt, and can be used straight from the bottle.
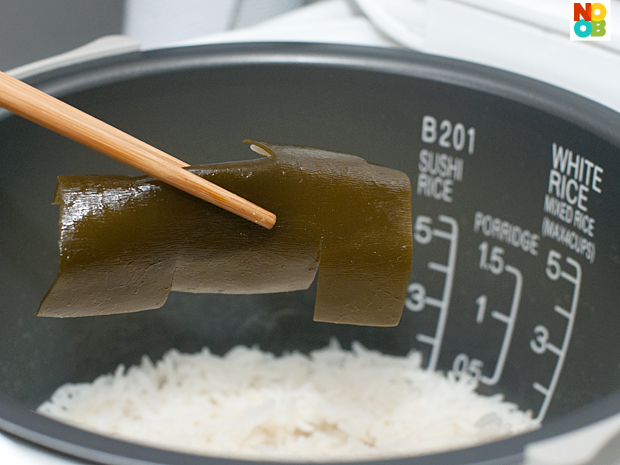
When the rice is cooked, discard the piece of kelp.
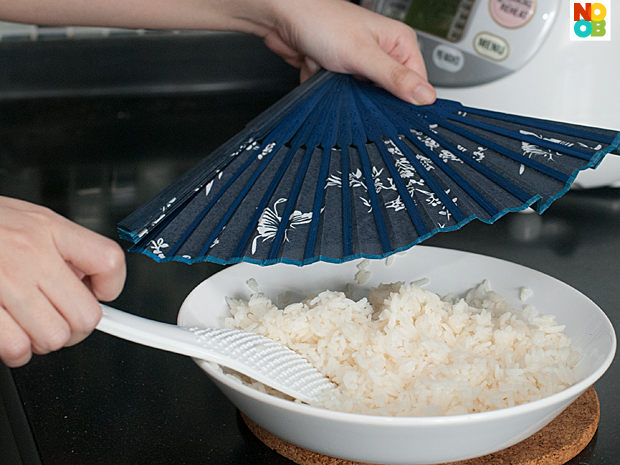
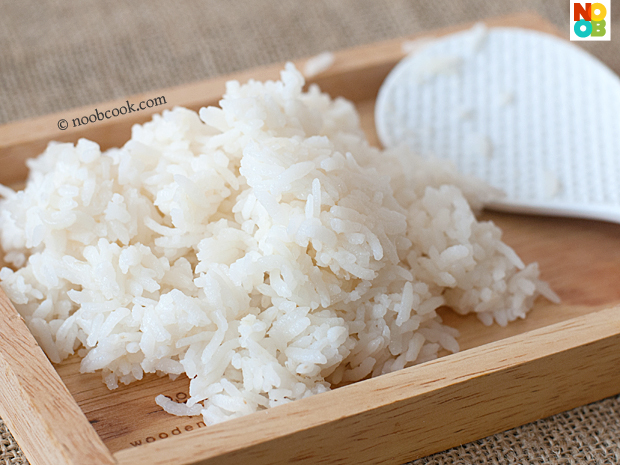
Transfer the cooked rice (while it is still hot) to a hangiri or any wide bowl. Pour prepared vinegar mixture over the rice. Stir the rice (gentle slicing action) using a rice paddle with one hand, while fanning the rice with a paper fan on the other hand. Do so until the rice has cooled to room temperature. Fanning the rice gets rid of excess moisture and gives the rice grains a glossy look.
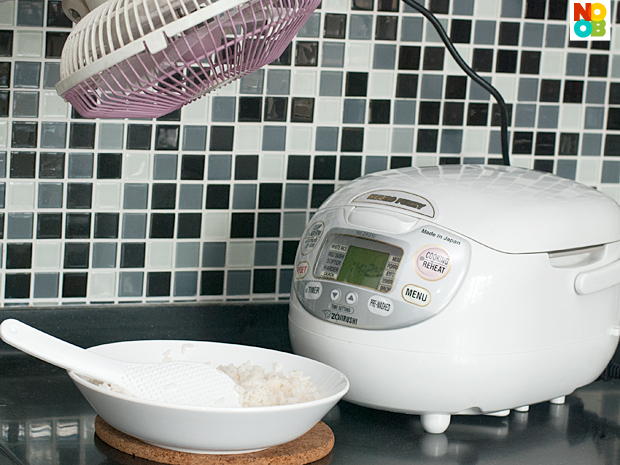
It is difficult for me to coordinate everything with only 2 hands (fanning, stirring & photographing), so I mounted a portable fan along the side of my kitchen cabinet to automate the fanning process.
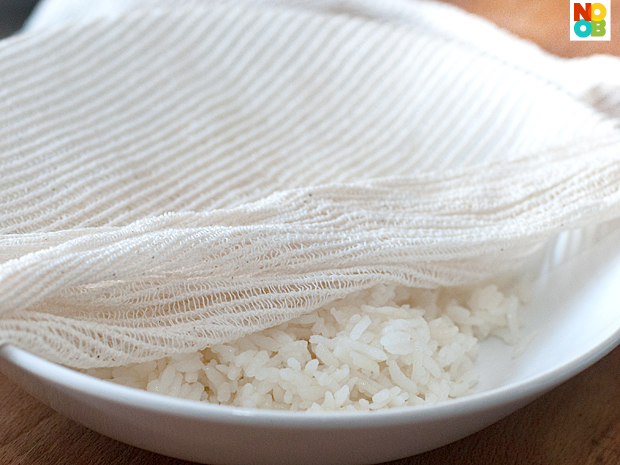
Cover the bowl of rice with a damp slotted cloth (dim sum cloth is perfect for this role) to keep the rice fresh and moist. Use the rice as soon as possible, preferably within a few hours. Wrap leftovers in cling wrap before refrigerating.
Your sushi rice is now ready to be used for making all kinds of Japanese sushi.
Sushi Rice Recipe
If you are making your own sushi vinegar, you can tweak the vinegar mixture to complement the type of sushi you are making. For example, the stronger the filling/topping served, the more salty and less sweet the vinegar mixture. You can experiment with different proportions of vinegar, salt and sugar to come up with your own unique concoction.
A Japanese rice cooker is also a good investment if you cook rice often. The Japanese rice cooker usually comes with markings for the water, and a function to soak the rice before cooking to improve the texture of cooked sushi rice.
Ingredients:
- 1 cup Japanese short-grain rice
- water to cook rice (ratio of 1 cup rice: 1 1/4 cups of water, varies slightly with different rice cooker)
- a piece of konbu (kelp) roughly 5cm by 8 cm; optional
- 2 tbsp sake optional
Sushi Vinegar (A)
(skip this if you are using ready-made seasoned sushi rice vinegar)
- 2 tbsp Japanese rice vinegar
- 1/2 tbsp caster or super fine sugar to taste; skip this if you are using bottled seasoned rice vinegar
- pinch of salt skip this if you are using bottled seasoned rice vinegar
Directions:
- Cook the rice in a few changes of water until the water runs clear. Optional: drain the rice in a colander for roughly 30 minutes. Add water, kelp and sake. Cook the rice using a rice cooker or simmer over the stove top.
- Prepare sushi vinegar by mixing (A) in a small, non-aluminum saucepan over low heat until the sugar dissolves. Alternatively, microwave at LOW for about a minute. The idea is to warm the vinegar just enough to dissolve the sugar, not to boil the mixture. Skip this step if using ready-made sushi vinegar.
- Make sushi rice. When the rice is cooked, discard the piece of kelp. Transfer the cooked rice (while it is still hot) to a hangiri or wide bowl. Pour prepared vinegar mixture over the rice. Stir the rice (gentle slicing action) using a rice paddle with one hand, while fanning the rice with a paper fan on the other hand.
- How to use the rice. Cover the bowl of rice with a damp slotted cloth to keep the rice fresh and moist. Use the rice as soon as possible, preferably within a few hours. Cling wrap the leftover rice tightly before refrigerating. Your sushi rice is now ready to be used for making all kinds of Japanese sushi.
References
- Sushi: Taste and Technique by Kimiko Barber and Hiroki Takemura
- VideoJug: How to Make Sushi Rice