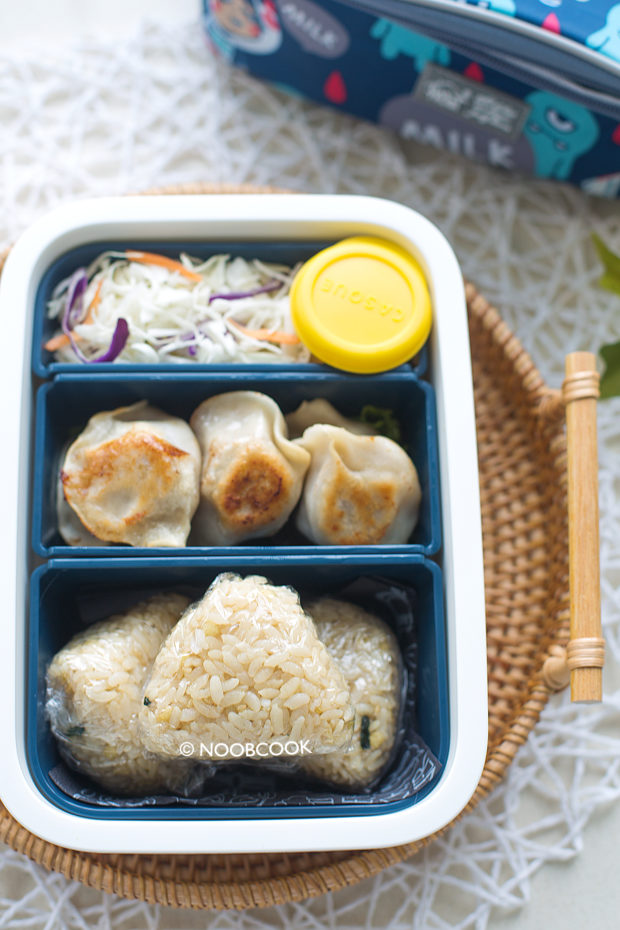
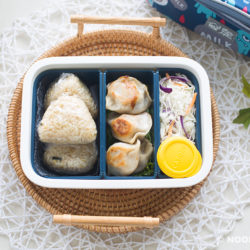
Onigiri Dumpling Lunch Box
This onigiri dumpling lunch box was really fast to make as I made it with supermarket conveniences: a packet of onigiri seasoning, frozen dumplings and pre-shredded coleslaw cabbage. Yes it sounds lazy but this lunch box was really quick to make yet delicious!
See Also:
FEATURED PRODUCTS
(contains affiliate links)
STEP-BY-STEP PHOTOS
ONIGIRI (JAPANESE RICE BALLS)
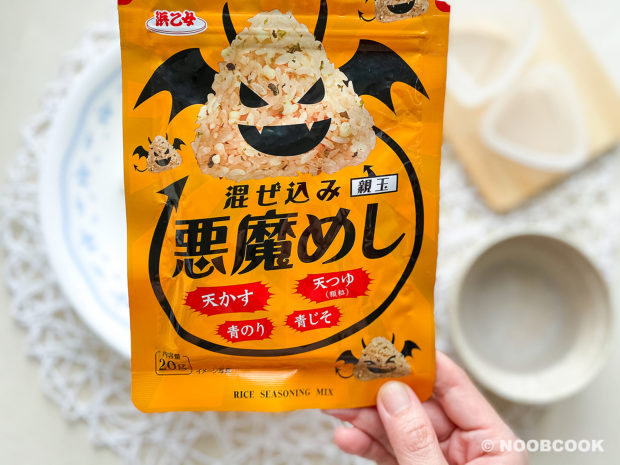
- As a cheat I used a packet of “devil onigiri” seasoning I bought from Don Don Donki. You can use any favourite onigiri seasoning mix. Generally, I use 160g cooked rice for every 10g of onigiri seasoning mix (varies from brand to brand), which yields 3 small onigiri for one lunchbox.
Steps for making the onigiri using a mold:

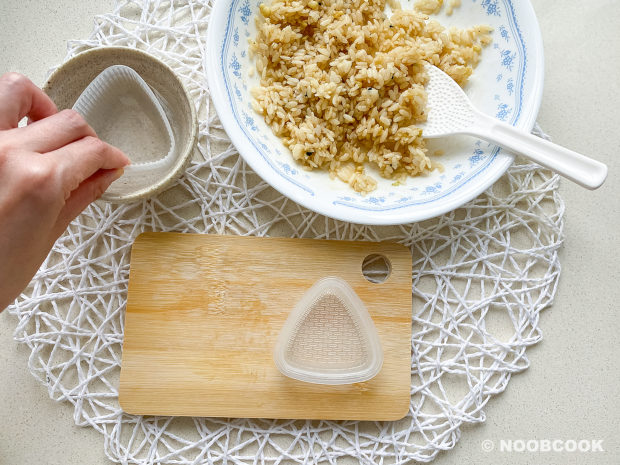
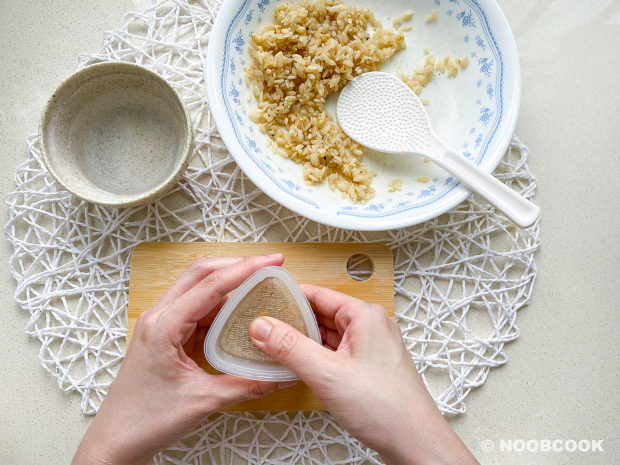
- I’m using a small 6 cm onigiri mold purchased from Daiso. This recipe makes roughly 6 small onigiri for two lunch boxes.
- Mix cooked short grain rice with the onigiri seasoning powder, until the seasoning is evenly distributed. Divide the seasoned rice into 6 equal portions.
- Have a small bowl of water by the side. This is for moistening the mold, the spatula and your fingers to prevent the rice sticking to surfaces in contact.
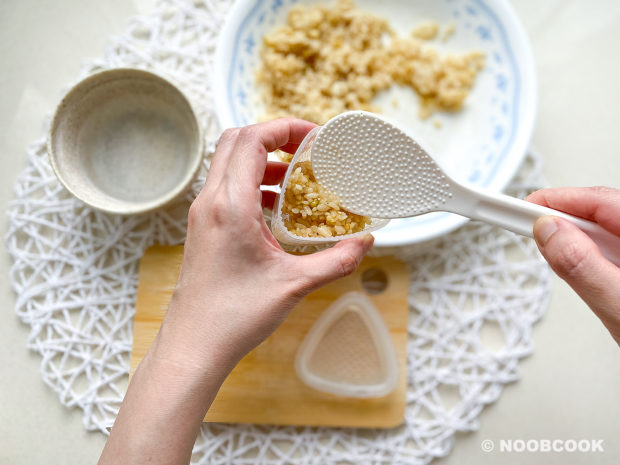
- Making the onigiri with a mold: Wet the spatula and fill the mold with one portion of rice. Cover the mold lid and press firmly to shape the onigiri. Release the mold cover and push out the onigiri. Remember to moisten the mold and spatula each time you make the onigiri.
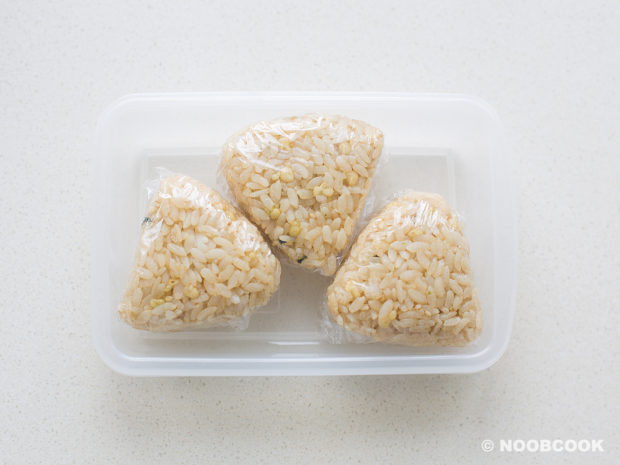
- Wrap the completed onigiri tightly with cling wrap to preserve the freshness . Eat the onigiri cold (room temperature). Or microwave on LOW (cling wrap removed) for 30 seconds to warm it up before eating.
- As the onigiri can be warmed up in the microwave, they can be prepared ahead the night before, which is what I’ll do the next time I make an onigiri lunchbox.
DUMPLING (OR GYOZA)
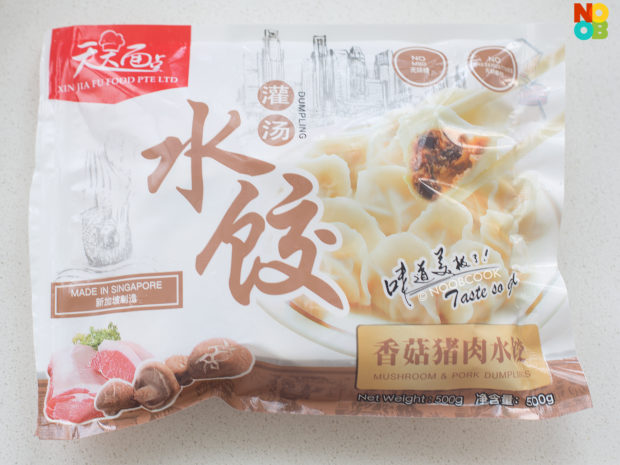
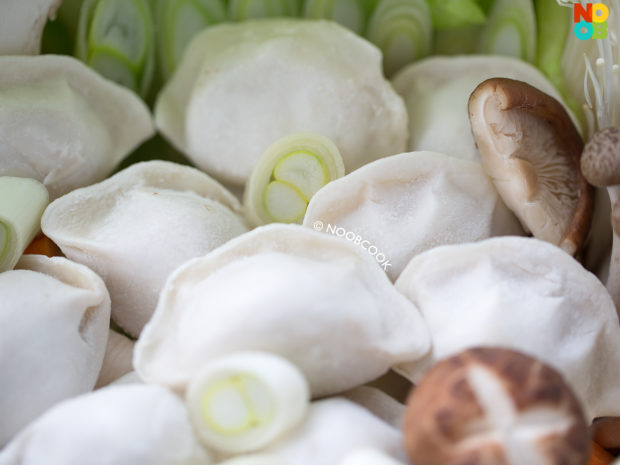
Instead of gyoza, I’m using Chinese frozen dumplings (pictured above; uncooked) for a change. They take slightly longer than gyoza as they are plumper, but otherwise the steps for pan-frying dumplings and gyozas are the same. For a simpler cooking method, you can actually cook them in a pot of boiling water until they float to the surface.
SHREDDED CABBAGE

As a short-cut I used pre-shredded coleslaw cabbage, so the salad for my lunch box was somewhat instant. I place a small sauce bottle of low-calorie Japanese sesame dressing in each lunch box.
LUNCH BOX
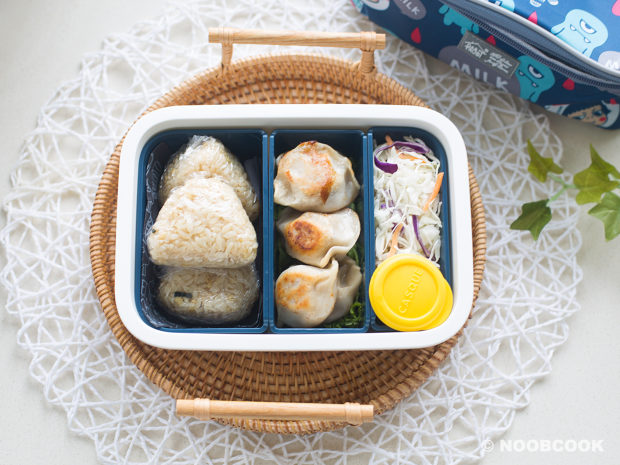
I’m using an Ikea’s rectangular lunchbox measuring 22×17 cm. Each lunch box contains 3 onigiri, 6 dumplings and some shredded coleslaw cabbage. For the dressing, I have a small sauce bottle of kewpie half-calorie sesame (goma) dressing.
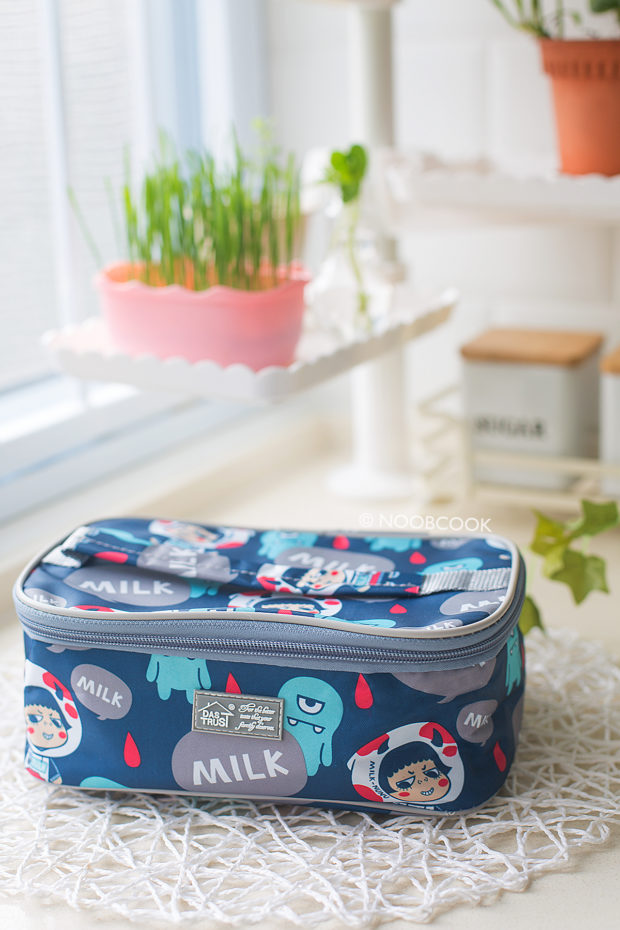
And this is the ‘pretty ugly’ bento bag debut for this lunch box :p
Onigiri Dumpling Lunch Box
The onigiri can be made ahead the day before, wrapped tightly in cling wrap and reheated in the microwave before eating.
Check out the step-by-step photos for making the onigiri using a mold on the previous page.
Ingredients:
- 1 cup short-grain white rice
- 1 1/4 cup water
- 20g onigiri seasoning powder (any favourite, I am using this)
- 12 frozen supermarket dumplings or Japanese gyoza do not thaw; see note
- 2 cups thinly shredded white “coleslaw” cabbage
- 2x 10ml half-calorie Japanese sesame dressing placed in a mini sauce bottle
You also need:
- onigiri mold – I am using small 6 cm mod which makes 6 onigiris (3 for each lunchbox)
Directions:
- Cook sushi rice. Rinse rice in a few changes of water until the water runs less cloudy (skip if using pre-washed rice). Rice cooker method: Add rinsed rice and water to a rice cooker and set to cook. OR stovetop method: Add rice and water to a non-stick saucepan. Bring to boil and lower heat to low and simmer, covered until water is just absorbed, about 10 minutes. Turn off the stove. Continue to let the rice steam with the lid covered for at least 10 mins before using.
- Make onigiri. Fluff up the rice with a spatula. In a wide bowl, measure 320g cooked rice to a bowl and let it cool down slightly but still warmed. Add onigiri seasoning and stir well with a spatula until the seasoning is evenly distributed. Divide the rice to six portions. Shape the seasoned rice to a triangular shape either by hand or using a onigiri mold. Always moisten your hands and onigiri mold with a small bowl of water at the side to prevent the rice from sticking. Wrap each onigiri tightly in cling wrap.
- Cook dumplings (or gyoza). Pan fry or boil the dumplings according to package ingredients.
- Prepare lunchboxes. Divide the food among two lunch boxes (I’m using Ikea’s). Pack each lunch box with a bottled sauce. This lunch box keeps well at room temperature for half a day. It can be eaten at room temperature without reheating. To reheat the onigiri, remove the cling wrap and microwave the onigiri on a plate on low heat for less a minute until slightly warmed.
Cooking Note (s):
- To pan fry dumplings or gyoza: Grease frying pan with some sesame oil. Arrange dumplings on their flat bottom and cook in the oil without touching them, until the bottom skin is browned and crisp. Add enough water to cover the dumpling at least 1.5 cm. Cover with lid and steam for 3-5 minutes, or until almost all the water is evaporated. Drizzle the remaining sesame oil around the pan, and pan fry the other surfaces of the dumplings briefly until lightly seared throughout.
- To boil dumplings or gyoza: Bring water to boil in a saucepan or pot. Add frozen dumplings and cook until they float to the surface of the water, about 3-5 minutes depending on their size.